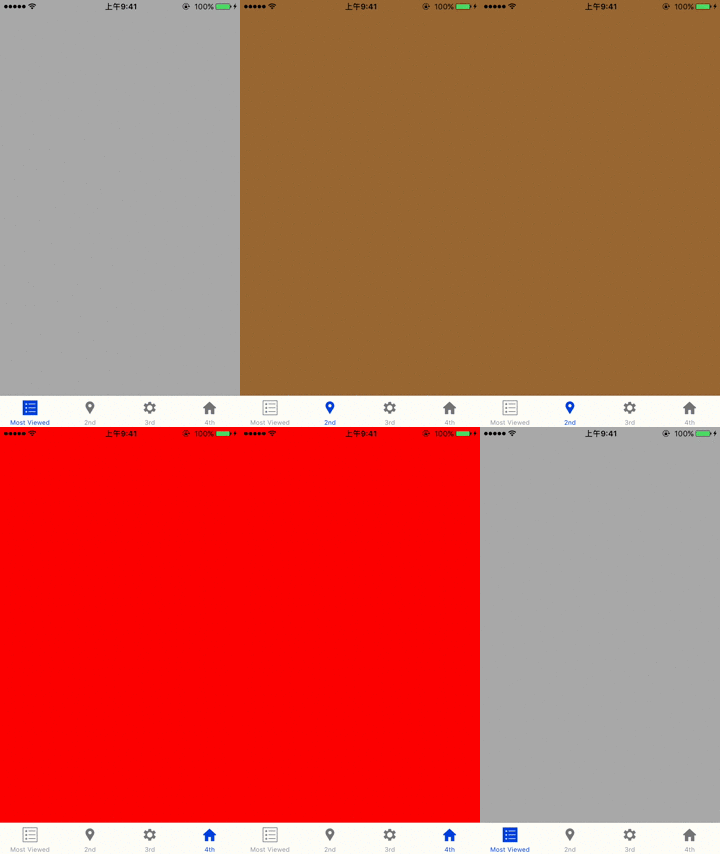
UITabBarController 標籤控制器

一、新增3 個UIViewController
vc2.swift
import UIKit

class vc2: UIViewController {

    override func viewDidLoad() {
        super.viewDidLoad()

        view.backgroundColor = .brown
        title = "2nd"
    }

    override func didReceiveMemoryWarning() {
        super.didReceiveMemoryWarning()
    }
}
vc3.swift
import UIKit

class vc3: UIViewController {

    override func viewDidLoad() {
        super.viewDidLoad()

        view.backgroundColor = .blue
        title = "3rd"
    }

    override func didReceiveMemoryWarning() {
        super.didReceiveMemoryWarning()
    }
}
vc4.swift
import UIKit

class vc4: UIViewController {

    override func viewDidLoad() {
        super.viewDidLoad()

        view.backgroundColor = .red
        title = "4th"
    }

    override func didReceiveMemoryWarning() {
        super.didReceiveMemoryWarning()
    }
}
二、ViewController.swift
import UIKit

class ViewController: UIViewController {

    override func viewDidLoad() {
        super.viewDidLoad()

        view.backgroundColor = .lightGray
        title = "1st"
    }

    override func didReceiveMemoryWarning() {
        super.didReceiveMemoryWarning()
    }
}
三、AppDelegate.swift
宣告資料
var TC = UITabBarController()建立UITabBarController
func application(_ application: UIApplication, didFinishLaunchingWithOptions launchOptions: [UIApplicationLaunchOptionsKey: Any]?) -> Bool {
        // 系統預設
        let one = ViewController()
            one.tabBarItem = UITabBarItem(tabBarSystemItem: .mostViewed,
                                          tag: 1)
        /*
         .more           ...
         .favorites      星星
         .featured       星星
         .topRated       星星
         .recents        時鐘
         .contacts       頭像
         .history        時鐘
         .bookmarks      書本
         .search         放大鏡
         .downloads      正方形, 向下箭頭
         .mostRecent     時鐘
         .mostViewed     清單
         */
        // 自定義文字, 圖片
        let two = vc2()
            two.tabBarItem = UITabBarItem(title: "2nd",
                                           image: #imageLiteral(resourceName: "two"),
                                           tag: 1)
        // 自定義預設圖片, 選中時圖片
        let three = vc3()
            three.tabBarItem = UITabBarItem(title: "3rd",
                                            image: #imageLiteral(resourceName: "three"),
                                            selectedImage: #imageLiteral(resourceName: "three2"))
        // 自定義, 各自設定
        let four = vc4()
            four.tabBarItem.image = #imageLiteral(resourceName: "four")
            four.tabBarItem.title = "4th"
    // 加入項目
    TC.viewControllers = [one, two, three, four]
    // 預設頁面
    TC.selectedIndex = 0
    // 背景顏色
    TC.tabBar.backgroundColor = UIColor.white
    // 半透明
    TC.tabBar.isTranslucent = false
    // 根視圖控制器(UITabBarController)
    window!.rootViewController = TC

    return true
}
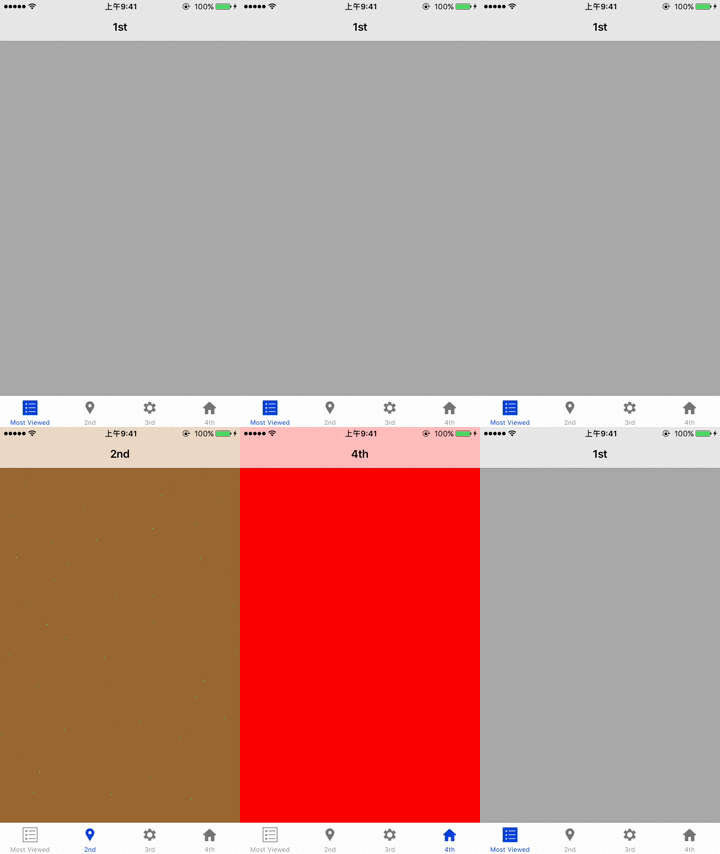
四、UINavigationController

導入代碼
_ = UINavigationController(rootViewController: ViewController?)AppDelegate.swift**
func application(_ application: UIApplication, didFinishLaunchingWithOptions launchOptions: [UIApplicationLaunchOptionsKey: Any]?) -> Bool {
        let one = UINavigationController(rootViewController: ViewController())
            one.tabBarItem = UITabBarItem(tabBarSystemItem: .mostViewed,
                                          tag: 1)
        let two = UINavigationController(rootViewController: vc2())
            two.tabBarItem = UITabBarItem(title: "2nd",
                                          image: #imageLiteral(resourceName: "two"),
                                          tag: 1)
        let three = UINavigationController(rootViewController: vc3())
            three.tabBarItem = UITabBarItem(title: "3rd",
                                            image: #imageLiteral(resourceName: "three"),
                                            selectedImage: #imageLiteral(resourceName: "three2"))
        let four = UINavigationController(rootViewController: vc4())
            four.tabBarItem.image = #imageLiteral(resourceName: "four")
            four.tabBarItem.title = "4th"
    TC.viewControllers = [one, two, three, four]
    TC.selectedIndex = 0
    TC.tabBar.backgroundColor = UIColor.white
    TC.tabBar.isTranslucent = false
    window!.rootViewController = TC

    return true
}
下載完整範例 OneDrive